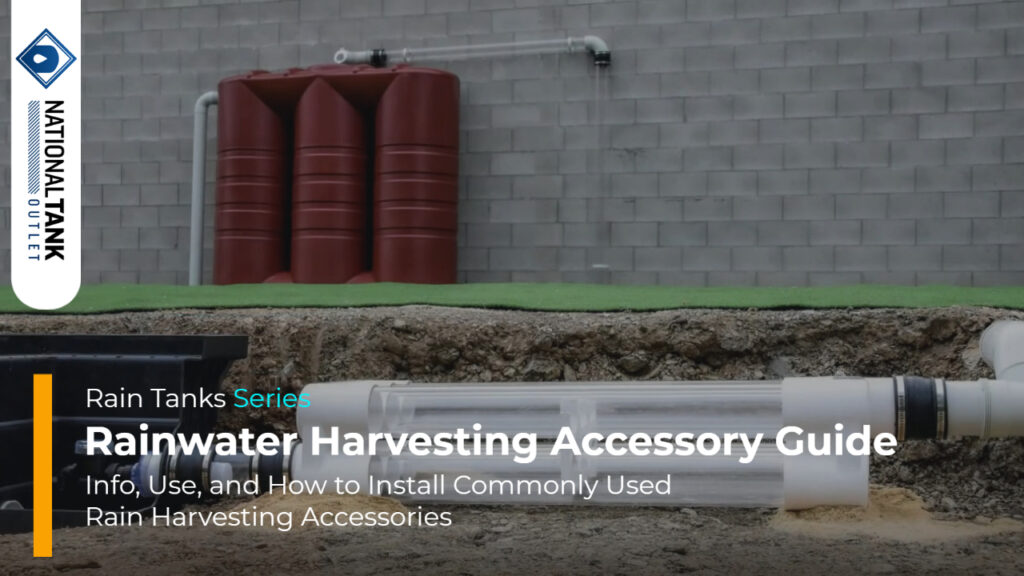
Rainwater harvesting systems work at their best when paired with rain harvest accessories to provide better quality water for use. There are a distinct set of accessories available as add-ons that can be used with most if not all rainwater harvesting (RWH) setups. The most popular product types are the tank screen, downspout screen, and first flush diverter.
Each accessory is designed for a set place and function in the overall rainwater system. Rainwater accessories are purpose-built to filter out unwanted material and debris, discard contaminated water, keep the rain tank and plumbing free of pests, and more depending on the type of accessory.
This rainwater harvesting accessory guide provides an overview of the details, use, and how to install today’s available RWH accessories.
If searching for rain harvesting accessories, we offer many of the commonly used products available online to buy, install, and use in rainwater applications, regardless of your location. You can find them here.
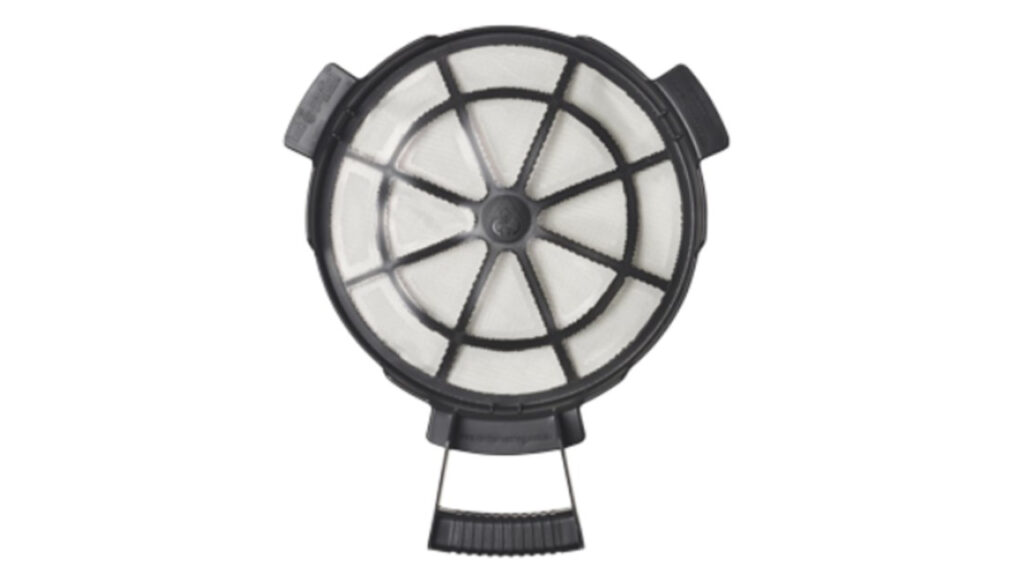
Tank Screen
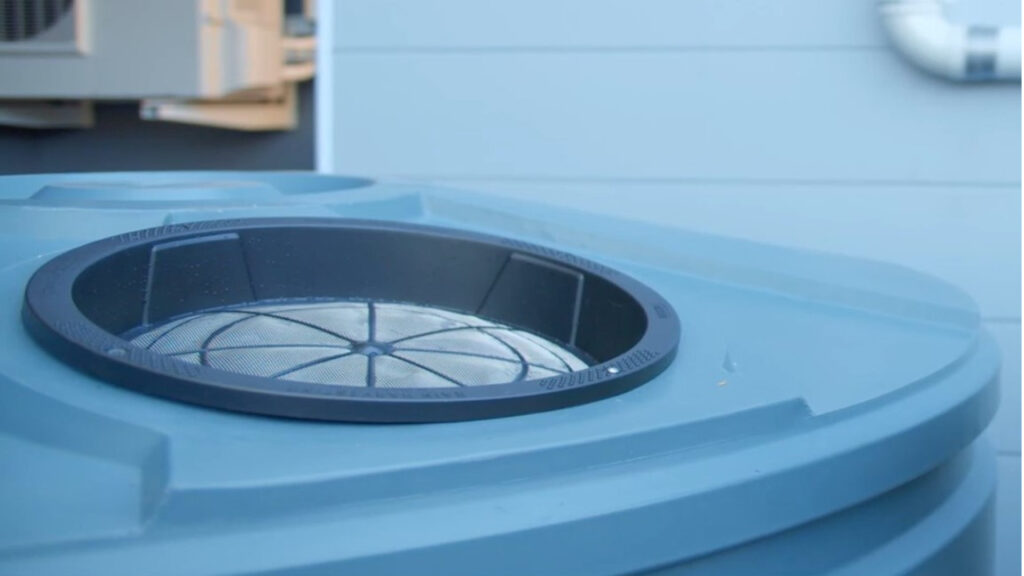
The Tank Screen is an add-on accessory for rain tanks meant to capture debris right before it reaches inside the container. Tank screens are made for use with polyethylene or steel rainwater collection tanks built with a manway port on the top head of the tank. They are designed for RWH setups that feature an open flow of water that pours directly from plumbing or a downspout and into the tank’s manway port.
Installing a tank screen accessory into a tank’s manway port provides a filtration screen type barrier between the rainwater arriving from the roof and the water being deposited in the container. The tank screen will capture and remove any larger debris such as sticks, leaves, bugs, or animals that may travel with the rainwater from the roof before it can make it into the tank to dirty the collected water and cause extra maintenance needs.
A tank screen is not effective in filtering out bacteria, viruses, parasites, chemicals, or sediments that may be within the rainwater. Other accessories will be required for this.
Installing and Location
As a rain harvesting accessory, the tank screen has a simple and straightforward install. First, find the right tank screen size to fit your rain tank. Tank screens are sized by diameter to match the measurement of your rain tank’s manway port.
Most rain tank manways, and therefore also tank screens, are either 8 inches, 12 inches, or 16 inches in diameter. If you do not know the diameter of your tank’s manway, use a tape measure to measure from one edge straight to the other edge.
When you have the right tank screen for your rain tank, installation is as simple as removing the tank lid and replacing it with the tank screen into the open manway port. Some types recommend fastening down the tank screen with metal screws. This is easily done with a screwdriver, or a power drill set to low torque and low power. After this, the tank screen is properly set in place, installed, and ready for use.
Solar Shield
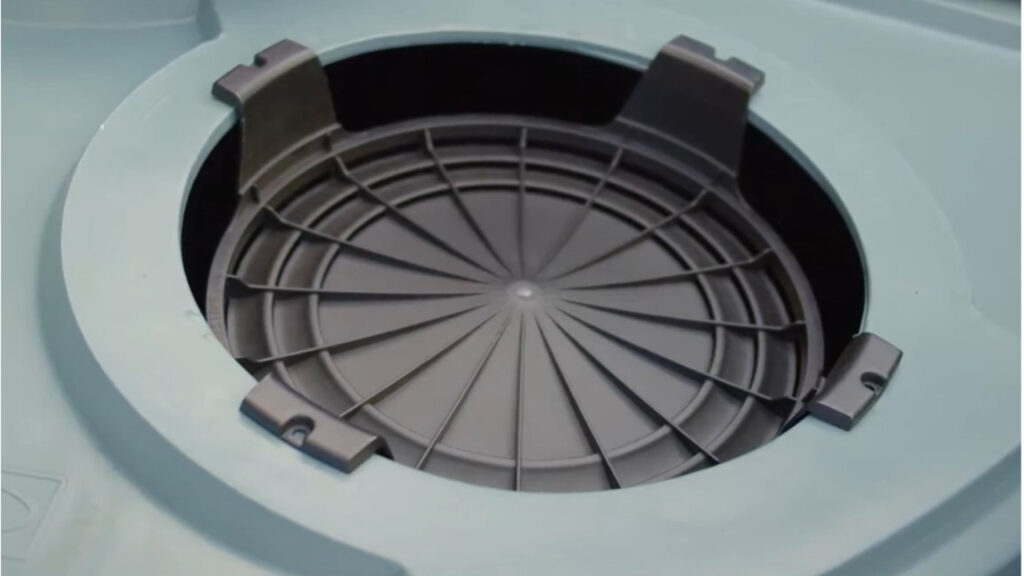
The Solar Shield is an accessory intended for rainwater systems using a tank screen. The solar shield installs beneath the tank screen, allowing both accessories to be fitted and used at the same time. A downside to using just a tank screen is that it does not completely block out sunlight, which can allow algae to grow in the tank over time. A solar shield is made to fit directly under the tank screen and keeps a significant amount of sunlight from reaching the water inside the tank.
Another benefit of the solar shield is that it acts as a brake for rainwater as it flows into the tank. When a solar shield is installed, water inflow is distributed in a more “showerhead” type design rather than in a straight flow as if from a tap. This helps to calm the incoming rainwater, minimizing the stirring up and resuspension of sediment within the tank that may have already settled.
The result: immediate water quality is improved, and any potential wait time is either shortened or eliminated altogether, meaning any newly collected rainfall can be used much sooner with less concern of suspended material.
Tank Screen Cover

The Tank Screen Cover is another accessory intended for use with the tank screen and/or solar shield kit. This RWH add-on is designed to work as a lid to completely block out sunlight while allowing a tank screen and solar shield to remain in place for catching debris and slowing incoming water.
The tank screen cover features two built-in inlet holes to allow plumbing such as PVC pipe to access the rain tank so rainfall can still be collected. This accessory is intended to be placed directly on top of a tank screen and can be further secured to a rain tank by use of screws and pre-drilled holes.
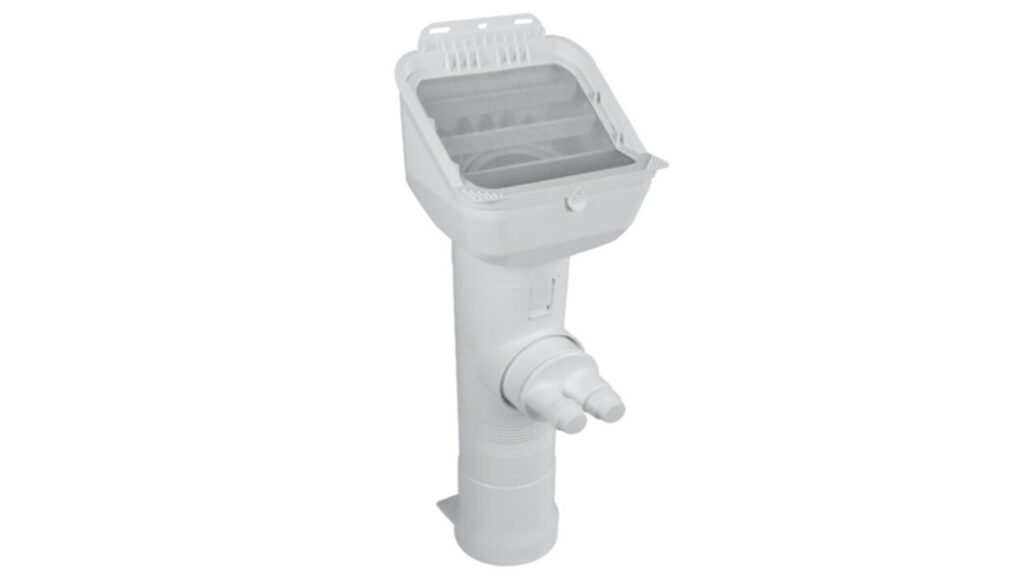
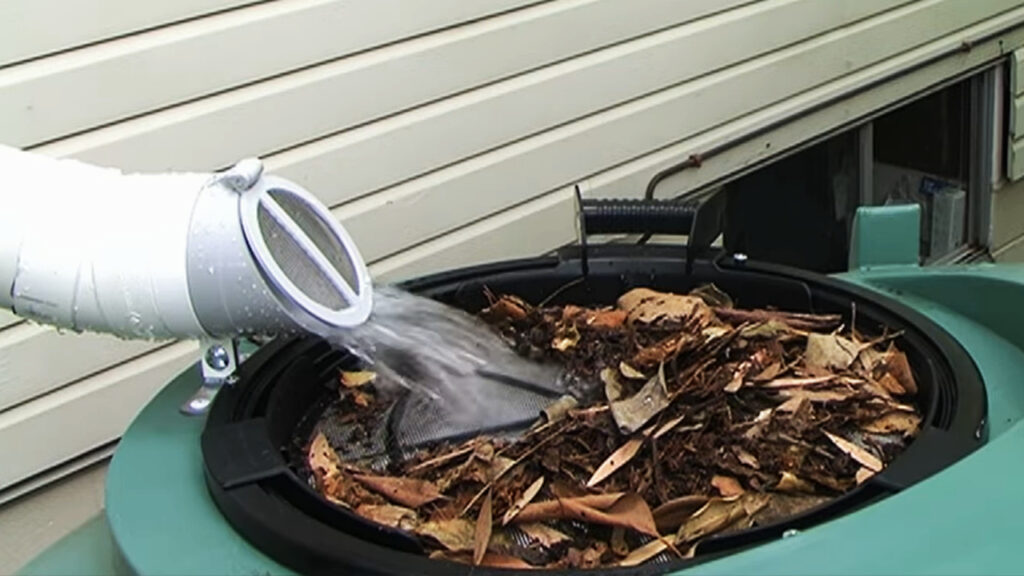
Downspout Screen
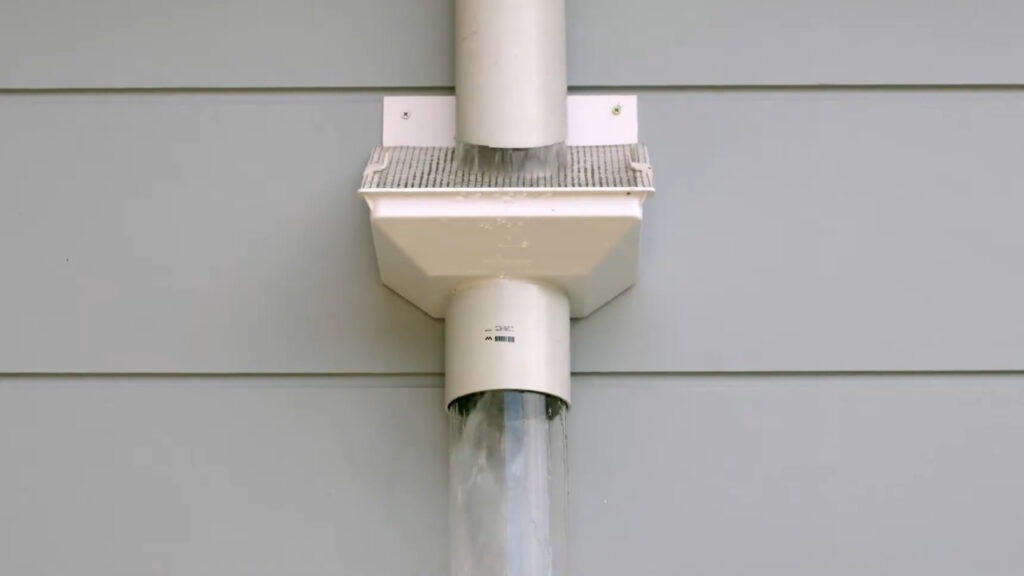
The Downspout Screen is one of the best known and most used rain harvesting accessories. Also known as a leaf eater or a rain head, downspout screens are made to be placed directly after the roof and gutter rainfall collection system. They are simple and effective in design. A downspout screen features one to two mesh-screen filters. The mesh-screen works to keep large debris and pests from traveling further within the RWH system.
The accessory often features a primary screen to collect large debris such as leaves, sticks, other plant matter, dead animals, insects, and the like. A secondary screen is often included beneath the primary screen and is built with a finer grade mesh to keep living insects, such as mosquitoes, from entering the rain system’s downstream plumbing.
The downspout screen is often the first accessory used in a line of defense against unwanted material and to clean rainwater as it’s being collected. Similar to a tank screen however, a downspout screen will not remove fine materials such as microorganisms, chemicals, pollen, or sediments that may be dissolved or suspended within the rainwater. Downspout screens are often used along with a tank screen in the event some debris makes it past the downspout screen.
For the downspout screen filter in the video above, we offer it here: the Clean Rain Ultra. For a rain barrel like the one in the video, we offer the fully collapsible, 132 gallon My ECO Barrel Rainwater Harvesting Barrel.
Installing and Location
Downspout screens are available in different styles and sizes, meaning exact installation steps and setup may vary to the individual product. However, overall installation is relatively similar. The downspout screen is made to be placed within the downspout piping used to connect the gutters to the tank for collecting rainfall from the roof.
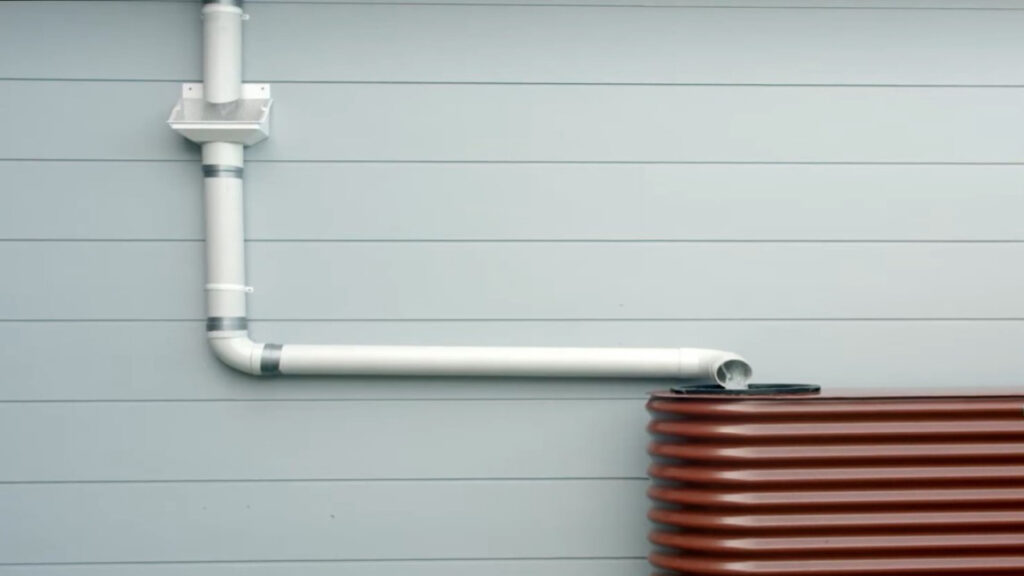
Installing a downspout screen will often require removing or cutting a section from the downspout that is at least the size of the accessory. Then the accessory needs to be mounted to the wall under the open cut gutter, and attached to the remaining downspout or to new plumbing that will run to the rain tank.
First Flush Diverter
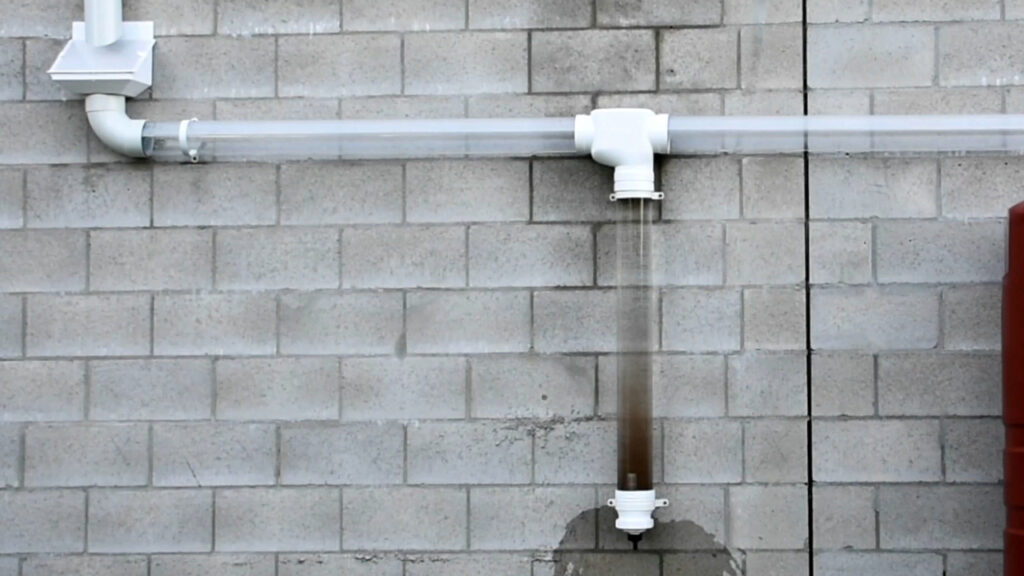
The First Flush Diverter is both an important and useful product for collecting overall cleaner rainwater. A first flush device is designed to divert, collect, and discard some of the first rainfall that flows over a roof and through the RWH system. In practice, this helps remove many unwanted or even potentially harmful materials that may be found in the rainwater collected from the roof of a structure.
There are many organic and inorganic materials that may be found in roof-collected rainfall. This can include bacteria, parasites, or viruses that come from dead animals, droppings, or other animal activity on the roof. Other materials include chemicals that may be found in rainfall polluted from human activities. A first flush device can successfully reduce the amount of these materials that get collected from rainwater harvesting. For more information, see our post on common rainwater contaminants and concerns.
The accessory works by taking a volume of the first rainfall and flushing it away. The first amount of rain that falls is often the dirtiest and can effectively wash a roof and gutter system of unwanted materials. When this works together with the first flush device, the result can be significantly cleaner water reaching the rain tank.
Options, Installing, and Location
First flush diverters are best suited for rainwater applications that will use the water inside such as for appliances or for systems aiming to achieve potable grade water. Otherwise, the other accessories used to screen and filter out debris from collected rainwater may be more than sufficient to capture water clean enough for most outdoor uses.
First flush diverters are available in several styles and sizes to match the needs and design of various rainwater harvesting systems. Diverters are made in smaller residential sizes, larger commercial grade sizes, and in designs for on-wall, on-post, and in-ground installation.
How a first flush device works and is installed will depend on the model. In general, first flush diverters feature a collection tube or tubes to store the first volume of rainfall, a means to stop collection to allow water flow to the rain tank, a method to prevent backflow of the water collected by the diverter, and a drain to empty the diverter when full. Most first flush diverters are recommended to be installed using PVC pipe and placed in the system between a downspout screen and the rain tank.
For more info on the first flush device, see our post First Flush Diverter Explained.
Flap Valves
The Flap Valve is a RWH accessory designed to be placed at the end of open plumbing to create a closed end for keeping pests out of piping without stopping or limiting the flow of water. A flap valve is intended for placement either on inflow plumbing that delivers water to a rain tank from the catchment system or on overflow plumbing leading away from the rain tank.
The accessory is used to upgrade open-ended plumbing into closed system plumbing to keep mosquitoes, frogs and other pests from entering the rainwater collection system while still allowing water flow. Flap valves feature a hinge, self-opening and closing flap, and often a built-in screen. The screen promotes airflow while the hinge allows the flap valve to open for water flow, passing of debris, or cleaning as needed and then close, protecting the pipe.
Installing and Location
Flap valves are designed for quick, easy installation. The accessory is made to fit to specific pipe sizes, often 3” and 4”, and simply slides over the plumbing end and firmly sets into place. A flap valve can be removed by twisting and pulling until loose.
Air Gap
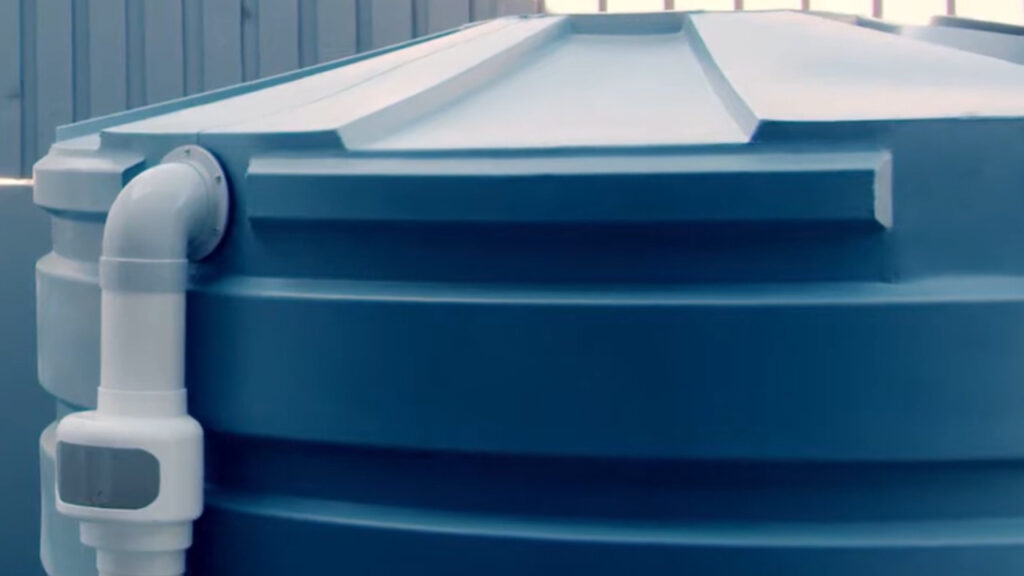
An Air Gap is made for use in a rain tank’s overflow system. The accessory is designed to prevent a backflow event from the overflow / storm draining system that can happen in wet systems due to heavy, extensive rainfall or blockage within the plumbing. A backflow event is when discarded waste water flows backwards and into the rain tank, potentially dirtying, contaminating, and/or ruining the stored water.
An air gap accessory will keep backflow from being able to reach the rain tank. The accessory does this by creating an open air space within the plumbing. When backflow occurs, water will spill out of the air gap accessory rather than pouring back into the tank. An air gap also features two built-in screen filters to prevent unwanted animal and insect pests from being able to enter the system. Another benefit, the air gap can increase overall system water flow due to the physical break that improves access to atmospheric pressure.
Installing and Location
The air gap is intended for installation within a rain tank’s overflow plumbing. They are recommended for placement at or around shoulder height to make for easier access in inspection and cleaning. An air gap is often installed immediately after an elbow-shaped plumbing connection made to PVC pipe used for the tank overflow. Built-in screens are removable to allow easy cleaning as needed to remove any potential buildup of debris, biofilm, algae, or sediment.
Water Level Gauge
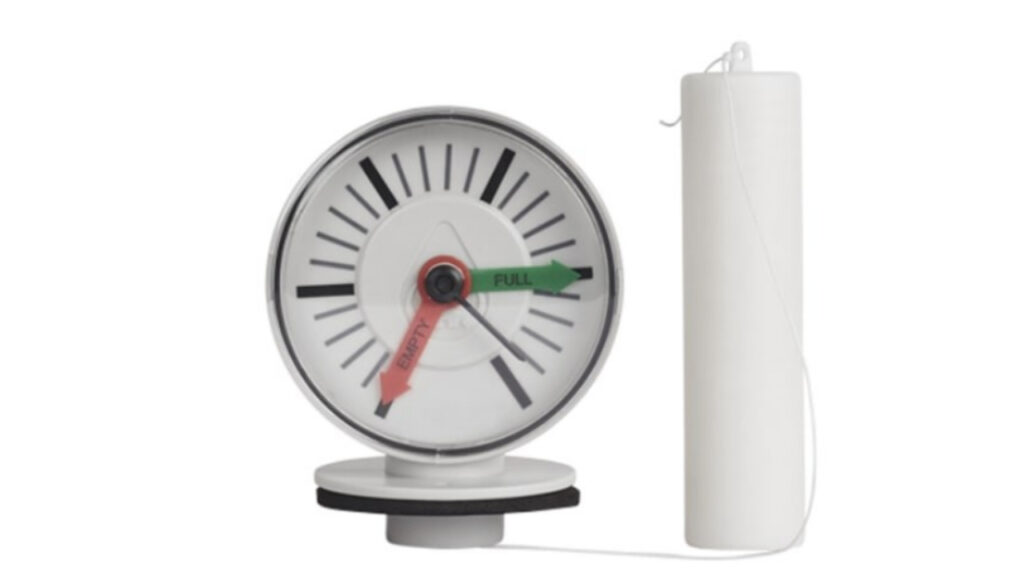
A Water Level Gauge allows the water level in a rain collection container to be easily checked and monitored without having to open the tank. There are different types available, but the string and float gauge is commonly used. This type uses a floating balance attached to a string that sits at the water surface and then rises and falls when volumes change inside the tank.
Such water level gauges are purely mechanical, meaning they do not require batteries or electricity. They are suitable for all rain tank types and can be easily calibrated to match a personal rain tank for desired full and empty volume levels.
Calibration and Installation
To calibrate and install a water level gauge, first choose an ideal placement on the rain tank that will be easy for you to regularly see. Mark the location on the tank. Remove the clear face of the gauge. Hold the gauge at the height where you will install it. Lower the floating balance to the point where it is level with the bottom of the tank or higher if you want the gauge to read empty before the tank is actually dry. Now, move the red “empty” dial to where the water level indicator arm on the gauge is pointing.
Next, raise the float so it is level with the tank overflow port or where you want the gauge to read full. Now, move the green “full” dial to where the water level indicator arm on the gauge is pointing. The water level gauge is now calibrated. Replace the clear front face.
Use a spade or hole saw and a power drill to make an installation hole in the tank for the water level gauge. Place the float through the hole and into the tank first, down to current water level, if any. Set the water gauge in the newly cut hole and use screws to secure it to the tank.
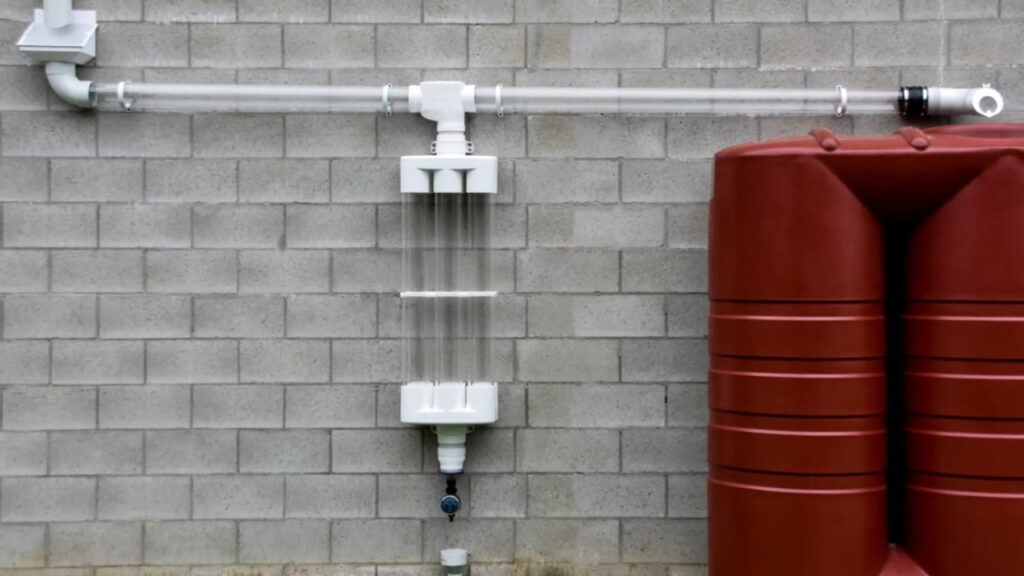
Pre-Tank Filter
A Pre-Tank Filter is a specially designed rain harvesting accessory made to be placed before the rain tank and used to filter incoming water prior to collection. Pre-tank filters often must be engineered to handle large volumes and high flow rates. These accessories are frequently intended to replace other pre-tank filter accessories such as tank screens and leaf eaters and are used to keep larger debris and materials from reaching the tank. First flush diverters are still recommended.
An example of a pre-tank filter is the 4” Maelstrom Filter designed with a 180 micron filter for fine point cleaning of rainwater. This filter accessory can be installed at the tank manway, in a tank riser for underground tanks, or as a standalone add-on.
The Maelstrom can filter rainwater as it flows in from a catchment system with an impressive ability to handle high volumes of water with a high capture efficiency. The Maelstrom can receive and filter 2.64 gallons per second at a 96% catchment efficiency, meaning there is only a 4% loss in incoming water volume, all while filtering debris through the 180 micron sized screen. The 180 micron screen ensures only dissolved or suspended materials smaller than 180 microns pass through the filter and that everything else is removed.
Water Treatment System
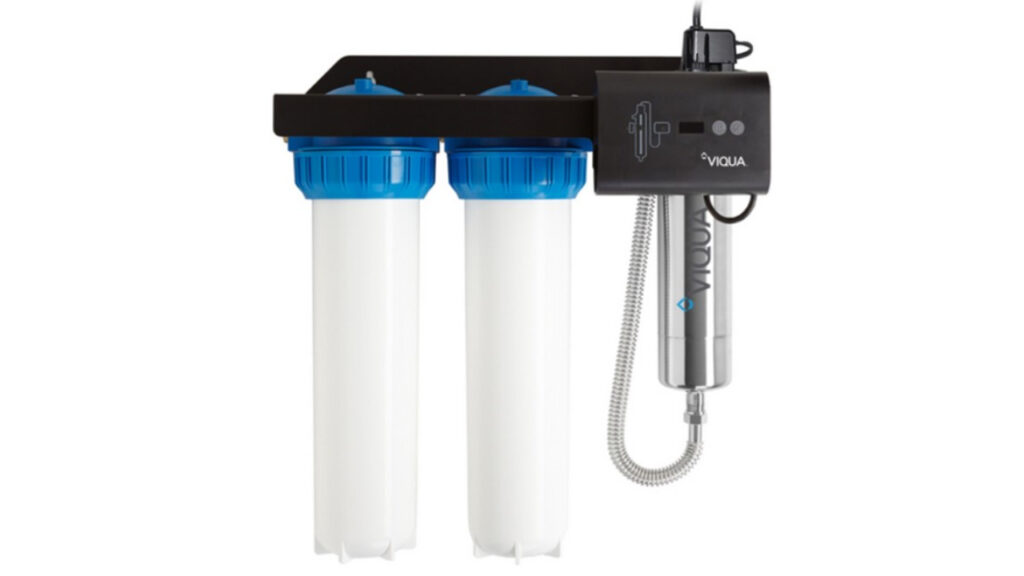
A Water Treatment System, or a whole house filter unit, is used to further filter and purify rainwater, so it is cleaner and safe for other applications. A water treatment system is often used with rainwater harvesting setups that will provide water for indoor use or for drinking. There are various water treatment systems and methods available. The system we are discussing and recommend is one built with multistage cartridge filtration and ultraviolet (UV) light irradiation.
Water treatment systems must be installed after the rain tank and must be used with a water pump. The reason: the filters and purification equipment require higher water pressures to properly work and larger debris have already been removed.
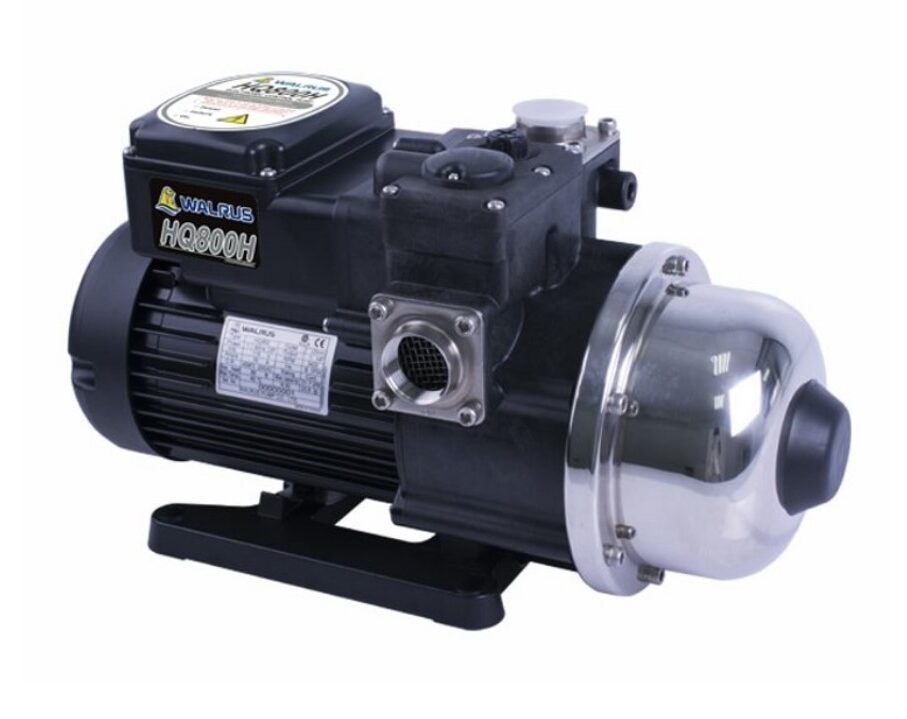
A rainwater treatment system is often set up in-line after a pump to treat water as it is pumped from the tank to taps inside a house or building where it can be used for drinking, bathing, cleaning, or appliances such as dishwashers and clothes washing machines.
There are many treatment systems and methods available capable of bringing rainwater up to drinking water or inside use quality. When choosing a water treatment system, ensure the product can handle the water flow rate you need. For more information, see our post on how to turn rainwater into drinking water.
Another option to compliment a water treatment system is to add an additional storage tank exclusively for storing treated water from the rain harvesting system so pure water is available for use. Pressure tanks, like those used with well water systems, also make a good choice for this application as it will store the purified water at pressure for use on demand.
Takeaway | Rainwater Harvesting Accessory Guide
Rainwater harvesting accessories are key components to creating a balanced, effective, and fully operational rain harvesting system. Proper installation and use of RWH accessories can make regular maintenance easier, less frequent, and will provide overall better water quality.
For more information on rainwater harvesting, review our Rain Tanks Series. If you need help or questions on our products, contact our team of rain harvesting professionals today.

Rain Harvesting Accessories
Image Credit: Many of the images within this guide can be attributed to Rain Harvesting by Blue Mountain Co., the manufacturer for many of our rain harvesting accessories.